Linksys RE1000 Setup: A Complete Guide

Do you want to learn how to setup Linksys RE1000 extender? Well, it is super easy for even a beginner to learn everything about the Linksys extender RE1000 setup and installation.

For people who are seated a little distance away from their router and are unable to connect to their home network, the Linksys wireless range extender is a godsend. Stated differently, the Linksys WiFi extender RE1000 setup is among the most remarkable and dependable range extenders on the market. The primary function of the Linksys extender is to increase the throughput of your current wireless network by detecting and relaying its wireless signal.

You may pair your Linksys extender with your current wireless router using the Linksys RE1000 setup wizard. You can have an uninterrupted, extended wireless network at your home after setting up and configuring your extender to work with your router.

Requirements for Linksys RE1000 Setup

Before you go about the Linksys WiFi extender RE1000 setup and installation, make sure you refer to the points below. Basically, the purpose of sharing these instructions is to assist you in understanding the necessary steps or points to be kept in mind prior to the setup. Check out the following points:

  • The Linksys RE1000’s default login information
  • A nearby power source
  • An Ethernet cable for configuration (optional)
  • The network credentials for your router’s WiFi
  • A laptop or a mobile device

Linksys RE1000 Extender Setup

In this section, you will walk through different methods for the Linksys extender setup RE1000. We have used two main methods i.e., the WPS method and the web interface method:

Using the WPS Button

  • The Linksys extender should first be plugged into a power outlet close to your primary router.
  • Verify that the Linksys RE1000 setup is turned On.
  • Find and push the WPS button now.
  • After two minutes, proceed to your primary router and push the WPS button located on the rear of the device.
  • The connection between the two devices will take a few minutes.
  • At this point, the Linksys RE1000 extender setup through WPS will be finished.

Through the Web UI Method

  • The Linksys extender should be plugged into the power outlet next to your primary router.
  • Using your laptop or mobile device, join the Linksys extender’s wifi network here.
  • Now, launch any installed web browser on your device and navigate to http://www.extender.linksys.com, which is the default web address.
  • You can access the Linksys admin page by using the URL.
  • You must accept the terms and conditions displayed on the website in order to continue.
  • As directed by the screen, connect the Linksys extender to the main router’s wifi network.
  • You can unplug the Linksys RE1000 extender now that the Linksys extender RE1000 setup is complete and place it wherever you want.

Setup Linksys RE1000 Extender Without CD

You can easily set up your Linksys extender without an installation disk. Although the disk is provided with the package, you don’t need to use it. Instead, you can use the web interface method or the WPS button method to go about the Linksys RE1000 setup and installation.

How to Troubleshoot the Linksys RE1000 Issues?

If you face any issues while attempting to learn how to setup Linksys RE1000 range extender, follow the steps given below:

  • First of all, make sure the extender is firmly plugged into the wall outlet.
  • Make sure the wall outlet does not have any power or fluctuation issues.
  • Thereafter, login to the Linksys extender to check for the latest firmware versions.
  • Follow the on-screen instructions to update your extender’s firmware to the latest version.
  • If you still come across the Linksys WiFi extender RE1000 setup issues, make sure you reboot your device.
  • If rebooting the device does not help, you may reset your device.
  • Press and hold the reset button to restore the factory default settings of your device.
  • Finally, the setup issues will be fixed.

How to Reset Linksys RE1000 Wifi Extender?

Follow the steps listed below to learn about the Linksys RE1000 reset process:

  1. Firstly, make sure the extender is powered On.
  2. After that, locate the reset button on your device.
  3. Press and hold the reset button for a good 10 seconds.
  4. Once you release the button, the device will reboot.
  5. It will take a few seconds to revert to the factory default settings.

Finally, the Linksys extender will be reset to the factory default settings successfully.

When you go about logging into your Linksys RE1000 extender, you must leave the username field blank and enter “admin” in the password field. After that, click Login and you will be logged into the Linksys extender successfully.

To change the Linksys extender password, you need to login to your device. Use the default web address of your device to login to it and then navigate to the Administration page. Click Change Password and follow the on-screen instructions to change the extender’s admin password.

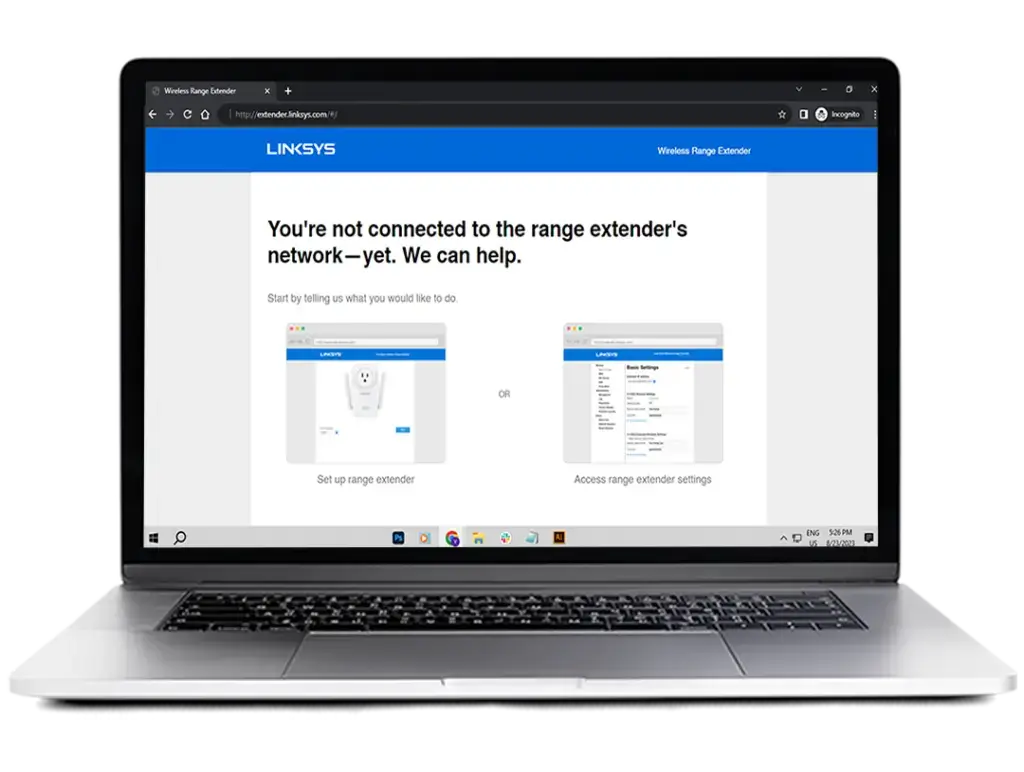
To update the Linksys extender’s firmware, you can use the default web address extender.linksys.com. Once you login to your device, you need to go to the Administration or Maintenance page. Select Firmware Update and follow the on-screen instructions to upgrade your device.

Yes, you can use your Android or iPhone device to login to your extender. Simply, open up a web browser and use the default web address to login to it.

Conclusion

This page was all about the Linksys RE1000 setup using the two main methods i.e., the web interface method and the WPS method. We hope you liked this page and that it helped you go about the initial configuration of your device without any hassle.

If you need any help or have any issues, feel free to talk to our experts team for further assistance.