A Complete Guide to Linksys RE3000W Setup
The Linksys RE3000W is a reliable Wi-Fi range extender that boosts your wireless internet signal and expands your Wi-Fi network coverage. Linksys RE3000W setup is a simple process to carry out and you can easily place it anywhere in your house. As a result, it will ensure an extended and seamless Wi-Fi experience throughout your home.
Setting up a Linksys RE3000W extender is critical for expanding the Wi-Fi coverage to a great extent. By visiting extender.linksys.com RE3000W, you can easily set up your extender and enhance your network’s range. As a result, you can ensure a strong and seamless connection throughout your home.
This information will teach you about the basic requirements that you might face while setting up the Linksys RE3000W. Moreover, it also includes the Linksys extender setup RE3000W and the methods to resolve the Linksys RE3000W issues. So, why delay anymore? Go through the post right away.
Requirements for Linksys RE3000W Extender Setup
During the Linksys RE3000W extender setup process, there are several steps that you must carry out. But you need to know about the basic requirements that you want to set up the Linksys RE3000W extender. Through this section, you’ll learn about the same basic requirements that you must arrange:


Linksys RE3000W WiFi Extender Setup
Now the time has come for you to start learning about the complete Linksys extender setup RE3000W process. So, go through the steps in this section right away.
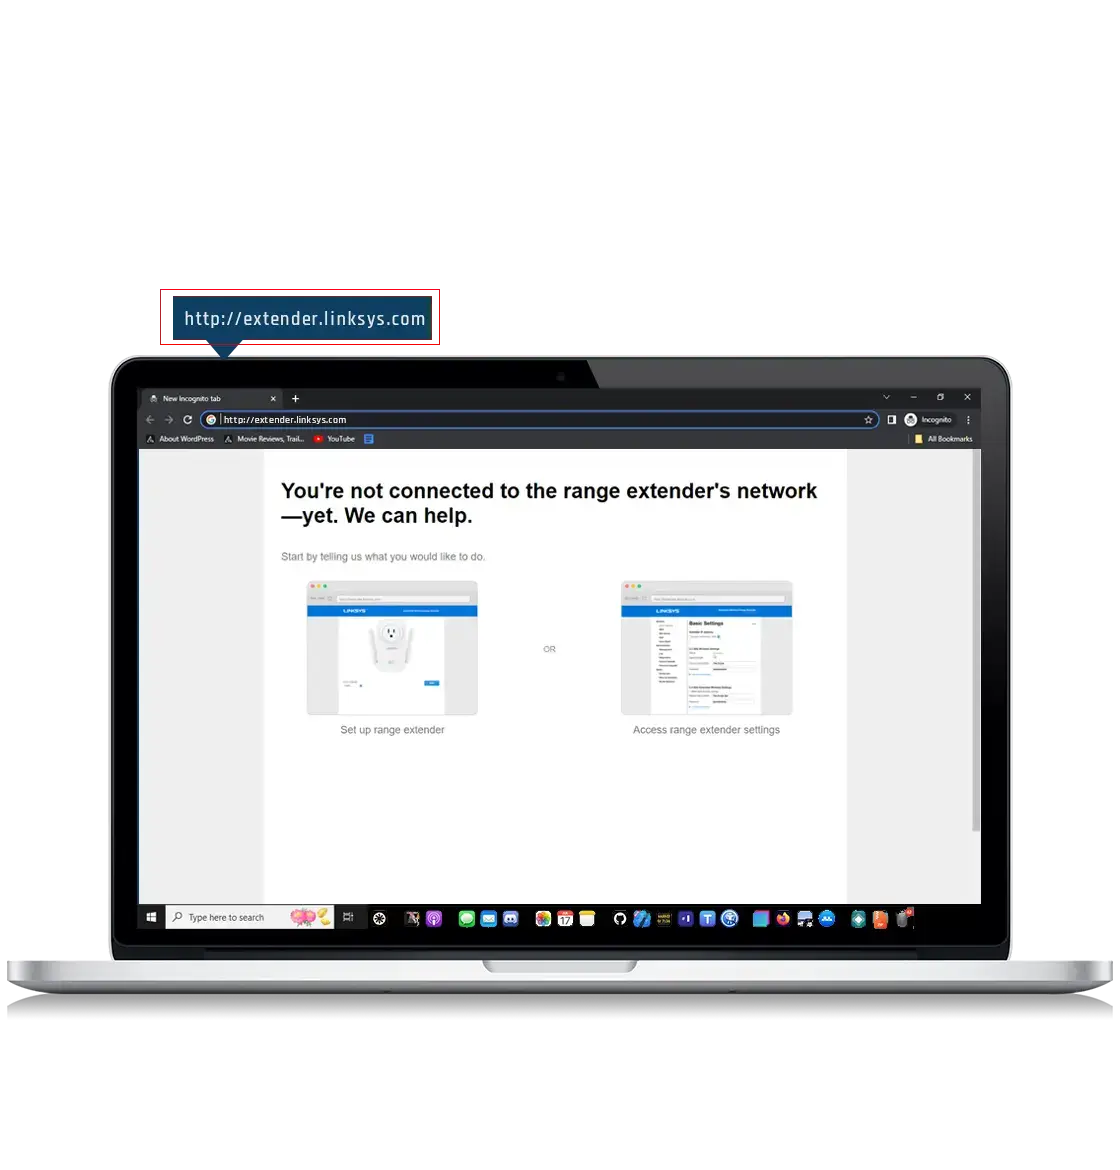
Through the Web Browser
- First of all, place the Linksys RE3000W Wi-Fi extender within your router’s Wi-Fi range.
- Then connect your device (Smartphone or Computer) to the extender’s Wi-Fi network, i.e., Linksys Extender Setup.
- After that, launch a web browser on your device and enter “http://192.168.1.1” or http://extender.linksys.com RE3000W in the URL bar.
- Then press the “Enter” button and you’ll access the Linksys sign-in page.
- On the sign-in page, you must click on the ‘Start’ button.
- Consequently, click on the “I Agree” button on the “License Agreement” screen.
- Now, it will search for the available Wi-Fi networks and choose the appropriate SSID.
- Finally, enter your wireless network password in the blank field and click on the ‘Next’ screen.
- Now you can place the extender at the appropriate place, connect your devices to its network, and use the extended network.
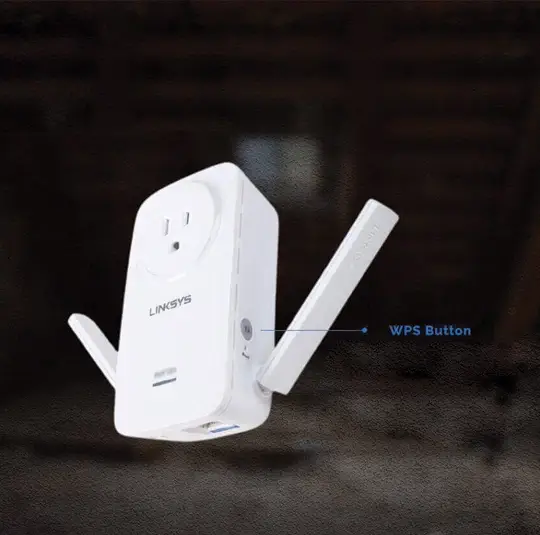
Using the WPS Button
- To set up your Linksys extender using the WPS button, you need to connect it to a power socket.
- Consequently, you must keep both your router and the extender within the same room.
- Next, you’ll need to locate and press the ‘Sync’ or ‘WPS‘ button on both of your devices at the same time.
- After that, you must wait for a few minutes until the WPS LED starts to light up the Solid Green light.
- After you see the green light, unplug the extender from the power socket and place it in the appropriate place.
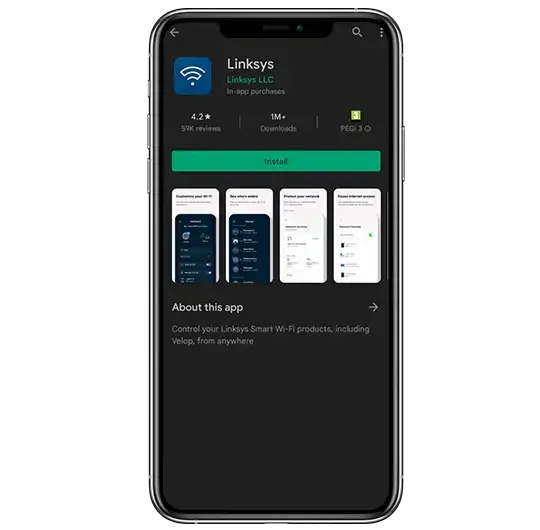
Using the Linksys App
- First & foremost, you must download the ‘Linksys‘ app from the Play Store or App Store.
- Then, plug your Linksys RE3000W into a power socket and connect your device to the extender.
- After that, launch the Linksys app on your device and follow the in-app instructions.
- This may include entering your Wi-Fi password and configuring the extender settings.
- Finally, your Linksys extender’s setup will be successfully completed.
- After that, you must test your extender network to check if it provides strong & reliable internet access.
You should successfully be able to set up the Linksys RE3000W extender and work to extend the Wi-Fi range.
How to Troubleshoot the Linksys RE3000W Setup Issues?
Are you encountering setup issues with your Linksys extender setup RE3000W issues? This troubleshooting section will help you resolve some common setup issues and get your Wi-Fi extender run smoothly.
Check the Cables
- If you are unable to set up your Linksys RE3000W extender, you must first check all the cables, i.e., the power cable & ethernet cable.
- In case you see that a cable is torn or damaged, you must consider changing the cables as soon as possible.
- But if the cables aren’t damaged, you must make sure that all the cables are properly connected at appropriate places.
Ensure a Stable Power Supply
- If the cables are properly connected to the extender and aren’t damaged, you must ensure that the extender is receiving a stable power connection.
- Your Linksys extender won’t work properly if it doesn’t receive a proper power supply.
- To fix the power supply, try power cycling your Linksys extender.
- But if doesn’t work, connect the extender to a different power plug.
Avoid Signal Interruption
- Signal interferences will also not allow you to set up the Linksys extender.
- Therefore, you must eliminate any type of signal interference between the router and the extender.
- The signal interference may happen due to the presence of electronic devices, such as microwave ovens & baby monitors.
- Therefore, you must carry out the Linksys RE3000W setup somewhere away from such electronic devices.
Reset Your Linksys RE3000W
- If none of the above troubleshooting methods work, try resetting your Linksys RE3000W extender.
- You can do it by holding down the ‘Reset’ button located on the extender’s top panel.
- Then you must release the Reset button after 5 seconds and it will start the reset process.
- Consequently, wait for a few minutes and the reset button will successfully complete.
Don’t allow the setup issues to slow you down. With these troubleshooting methods, you must immediately resolve the Linksys RE3000W setup issues and enjoy the stable & extended Wi-Fi network.
How to Update Linksys RE3000W WiFi Extender?
To ensure optimal security & performance, learn to update your Linksys RE3000W WiFi extender by adopting the Linksys extender setup RE3000W commands. Keeping your Wi-Fi extender’s firmware up-to-date is important for a secure & seamless Wi-Fi experience.
- First of all, open a web browser on your device and visit the Linksys Support Site.
- After that, you must search for your Linksys RE3000W and click on “Get Support” -> “Downloads” or “Firmware” option.
- Next, choose the latest firmware update and download it.
- Consequently, open a new web tab and enter “192.168.1.1” in the URL bar.
- Then you must access your Wi-Fi extender’s admin panel and visit “Administration” -> “Firmware Upgrade”.
- Next, you must click on the “Select a File” option and choose the .bin file that you had downloaded before.
- Afterward, you must click on the ‘Open’ -> “Start Upgrade” option.
You must regularly update your Linksys extender’s firmware is crucial for improved security, compatibility, and performance with your network. You can also visit our Linksys support website if you encounter any issues during the update process.
Wrapping It Up
This is about the basic requirements of the complete Linksys RE3000W extender setup process and the complete setup process. In addition, it also includes troubleshooting methods that can help you resolve common setup issues.
But if you are unable to carry out these processes by any chance, feel free to get in touch with our technical team. They will guide you through the complete Linksys RE3000W extender setup, and how you can troubleshoot the setup issues. Moreover, they’ll also help you to update your Linksys RE3000W extender.
Faq's
To reset your Linksys RE3000W WiFi Extender, first locate & hold down the ‘Reset’ button on the extender’s top panel. Then release the button after 5 seconds and your extender will automatically factory reset itself.
The default IP address of the Linksys RE3000W Extender is 192.168.1.1. Apart from this, the username needs to be blank, and the password should be ‘admin’.
Well, you don’t need a CD or any other software to set up your extender. But you can directly access your extender’s web-based setup page to carry out the Linksys extender setup RE3000W process.